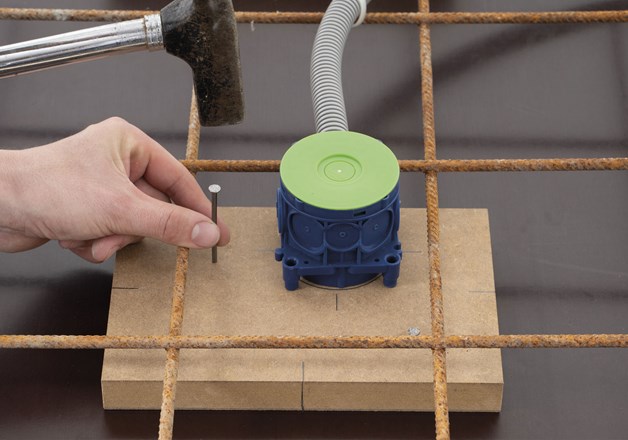
1. Mark desired position for luminaire on formwork with a cross. Use this to align formboard (230x150x25mm) and nail formboard down as shown in picture. Fix mounting capsule for concrete as shown in picture in the place you have marked and connect empty conduit.
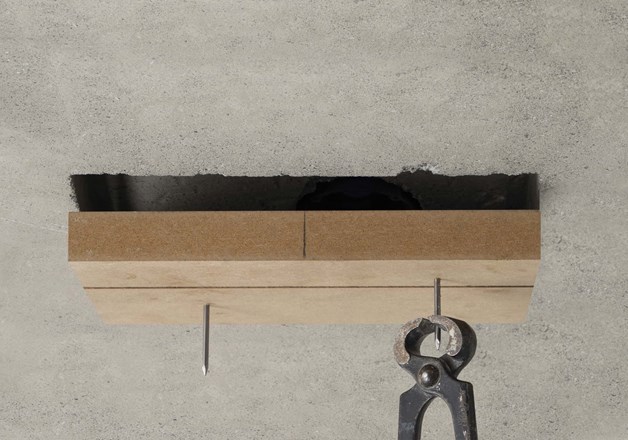
2. When formwork is stripped, formboard will be removed from ceiling. If necessary, use a tool to do so.
3. Take module from packaging. Take mounting flaps and insert into lateral cutouts so that flaps extend into module. Mounting flaps must be inserted as far as they will go and must not stick out from module.
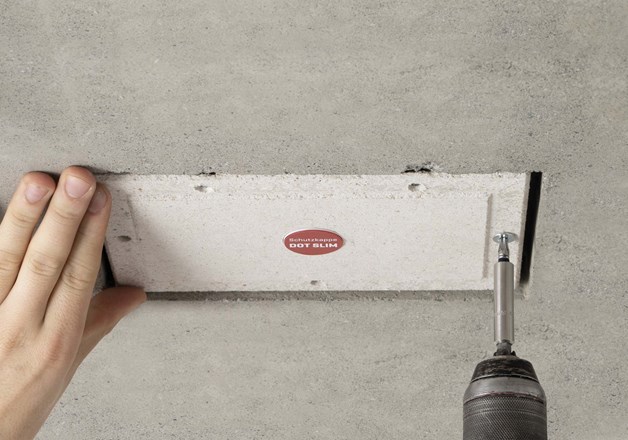
4. Adjust module in opening and use a 5mm drill to drill the holes needed for fixing the module with.
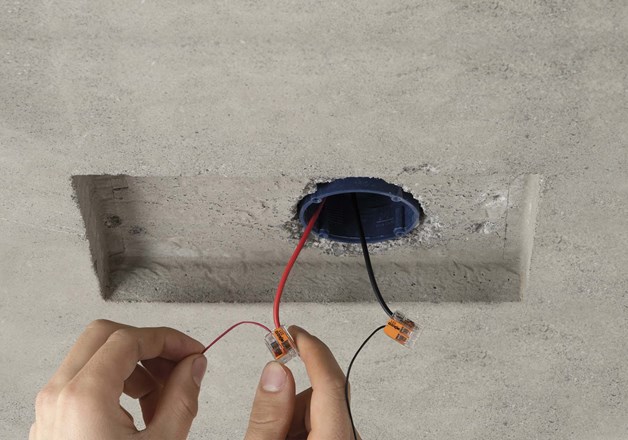
5. Take module back out of opening and establish module’s electrical connection. Make sure to observe serial cabling (series connection) and maximum current feed.
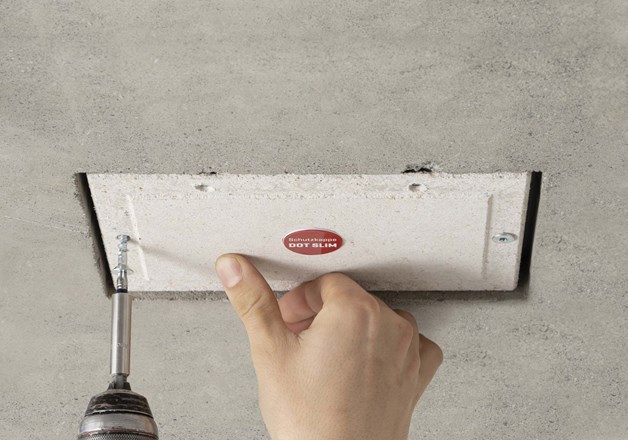
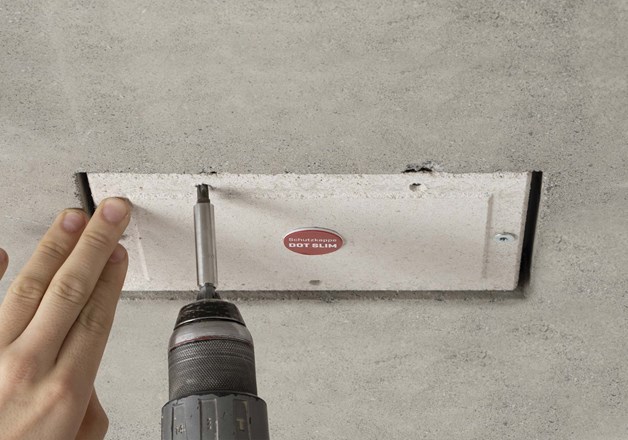
6. Carefully fix the module in opening with countersunk screw. Make sure module is fastened securely and flush with ceiling surface.
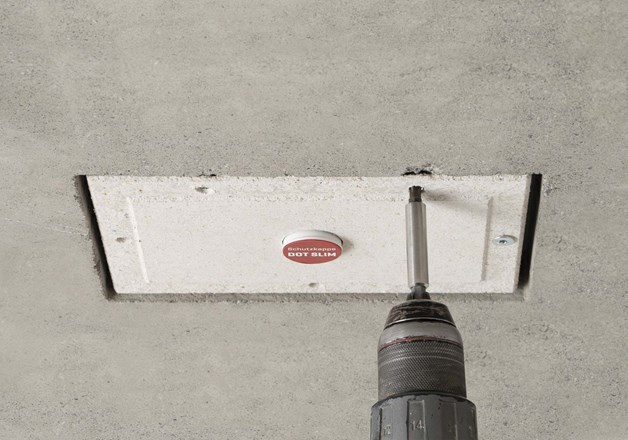
7. Carry out continuity test to check if electric circuit is closed. Then remove wire link.
CAUTION: Coordinate the filler thickness desired with site supervision or the tradesmen involved.
8. Adjust filler edge according to desired filler thickness (0-6mm) by evenly aligning the three adjusting screws.
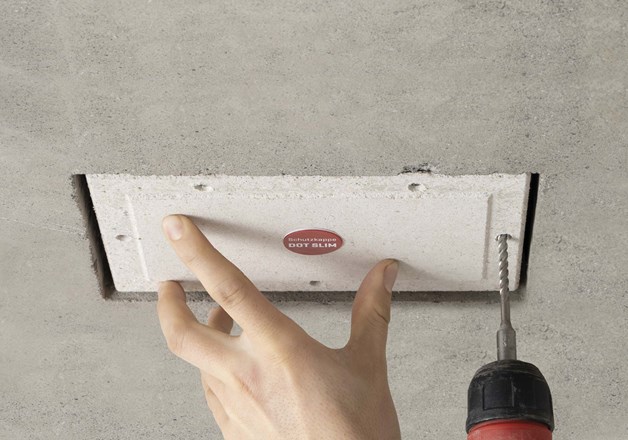
9. Insert the red protective cover and then fill the gaps neatly with the addition of a fabric tape.
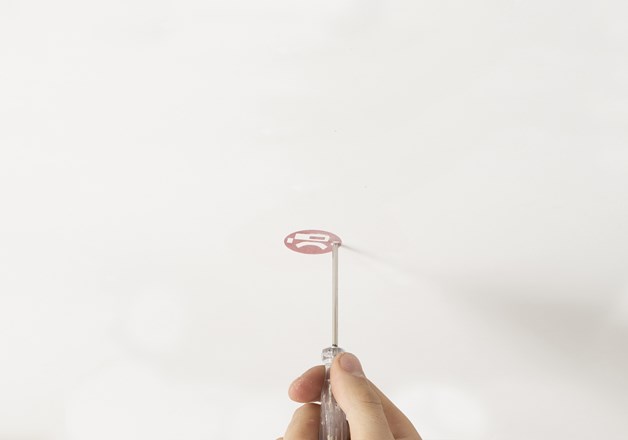
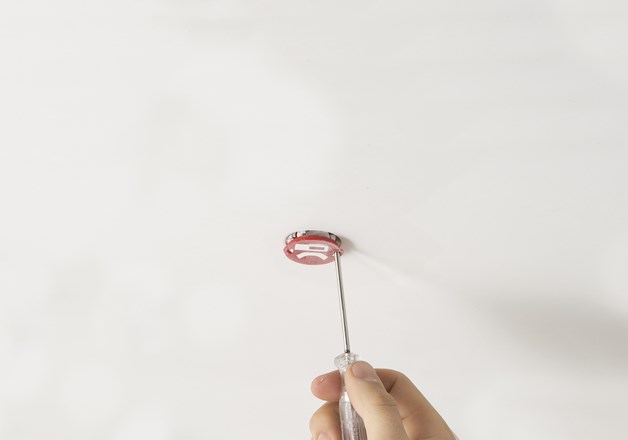
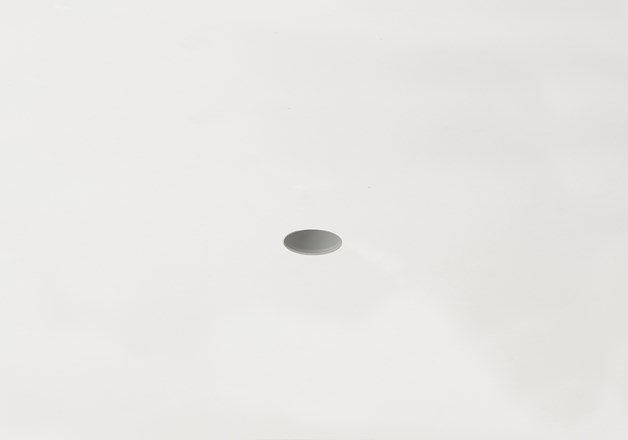
10. Carefully sand over red protective cover until it is entirely visible. Remove it using a slotted screwdriver. Imprecisions have to be reworked by hand.
11. Prime and paint module and filler ring with ceiling paint. Make sure that no primer or paint gets into the fixture into the LED insert.
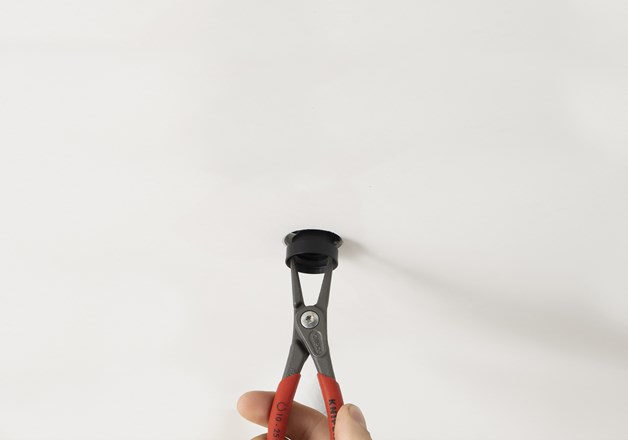
12. Put desired LED insert flush into LED mounting and turn clockwise by approx. 90° until it sits securely. You may use the DOT 28 System mounting pliers to do so. CAUTION: HOT PLUG! Every luminaire ist tested in live operation before shipping.